fbpx
Convert these batteries
  • DeWalt
    • DeWalt to Ryobi
    • DeWalt to Makita
    • DeWalt to Milwaukee
    • DeWalt to Erbauer
    • DeWalt to Mac Allister
  • AEG
    • DeWalt to Ryobi
    • DeWalt to Makita
    • DeWalt to Milwaukee
    • DeWalt to Erbauer
    • DeWalt to Mac Allister
  • Hikoki
    • DeWalt to Ryobi
    • DeWalt to Makita
    • DeWalt to Milwaukee
    • DeWalt to Erbauer
    • DeWalt to Mac Allister
  • Makita
    • DeWalt to Ryobi
    • DeWalt to Makita
    • DeWalt to Milwaukee
    • DeWalt to Erbauer
    • DeWalt to Mac Allister
  • Ridgid
    • DeWalt to Ryobi
    • DeWalt to Makita
    • DeWalt to Milwaukee
    • DeWalt to Erbauer
    • DeWalt to Mac Allister
  • Mac Allister
    • DeWalt to Ryobi
    • DeWalt to Makita
    • DeWalt to Milwaukee
    • DeWalt to Erbauer
    • DeWalt to Mac Allister
  • Milwuakee
    • DeWalt to Ryobi
    • DeWalt to Makita
    • DeWalt to Milwaukee
    • DeWalt to Erbauer
    • DeWalt to Mac Allister
  • Metabo CAS
    • DeWalt to Ryobi
    • DeWalt to Makita
    • DeWalt to Milwaukee
    • DeWalt to Erbauer
    • DeWalt to Mac Allister
  • Flex
    • DeWalt to Ryobi
    • DeWalt to Makita
    • DeWalt to Milwaukee
    • DeWalt to Erbauer
    • DeWalt to Mac Allister
  • Bosch Pro
    • DeWalt to Ryobi
    • DeWalt to Makita
    • DeWalt to Milwaukee
    • DeWalt to Erbauer
    • DeWalt to Mac Allister
  • Erbauer
    • DeWalt to Ryobi
    • DeWalt to Makita
    • DeWalt to Milwaukee
    • DeWalt to Erbauer
    • DeWalt to Mac Allister
  • Festool
    • DeWalt to Ryobi
    • DeWalt to Makita
    • DeWalt to Milwaukee
    • DeWalt to Erbauer
    • DeWalt to Mac Allister
Convert to these power tools
  • DeWalt
    • DeWalt to Ryobi
    • DeWalt to Makita
    • DeWalt to Milwaukee
    • DeWalt to Erbauer
    • DeWalt to Mac Allister
  • AEG
    • DeWalt to Ryobi
    • DeWalt to Makita
    • DeWalt to Milwaukee
    • DeWalt to Erbauer
    • DeWalt to Mac Allister
  • Hikoki
    • DeWalt to Ryobi
    • DeWalt to Makita
    • DeWalt to Milwaukee
    • DeWalt to Erbauer
    • DeWalt to Mac Allister
  • Makita
    • DeWalt to Ryobi
    • DeWalt to Makita
    • DeWalt to Milwaukee
    • DeWalt to Erbauer
    • DeWalt to Mac Allister
  • Ridgid
    • DeWalt to Ryobi
    • DeWalt to Makita
    • DeWalt to Milwaukee
    • DeWalt to Erbauer
    • DeWalt to Mac Allister
  • Mac Allister
    • DeWalt to Ryobi
    • DeWalt to Makita
    • DeWalt to Milwaukee
    • DeWalt to Erbauer
    • DeWalt to Mac Allister
  • Milwuakee
    • DeWalt to Ryobi
    • DeWalt to Makita
    • DeWalt to Milwaukee
    • DeWalt to Erbauer
    • DeWalt to Mac Allister
  • Metabo CAS
    • DeWalt to Ryobi
    • DeWalt to Makita
    • DeWalt to Milwaukee
    • DeWalt to Erbauer
    • DeWalt to Mac Allister
  • Flex
    • DeWalt to Ryobi
    • DeWalt to Makita
    • DeWalt to Milwaukee
    • DeWalt to Erbauer
    • DeWalt to Mac Allister
  • Bosch Pro
    • DeWalt to Ryobi
    • DeWalt to Makita
    • DeWalt to Milwaukee
    • DeWalt to Erbauer
    • DeWalt to Mac Allister
  • Erbauer
    • DeWalt to Ryobi
    • DeWalt to Makita
    • DeWalt to Milwaukee
    • DeWalt to Erbauer
    • DeWalt to Mac Allister
  • Festool
    • DeWalt to Ryobi
    • DeWalt to Makita
    • DeWalt to Milwaukee
    • DeWalt to Erbauer
    • DeWalt to Mac Allister

About

Blog

Free delivery on all orders to Mainland UK
Making from scratch: picture frame

| | 1 Comment

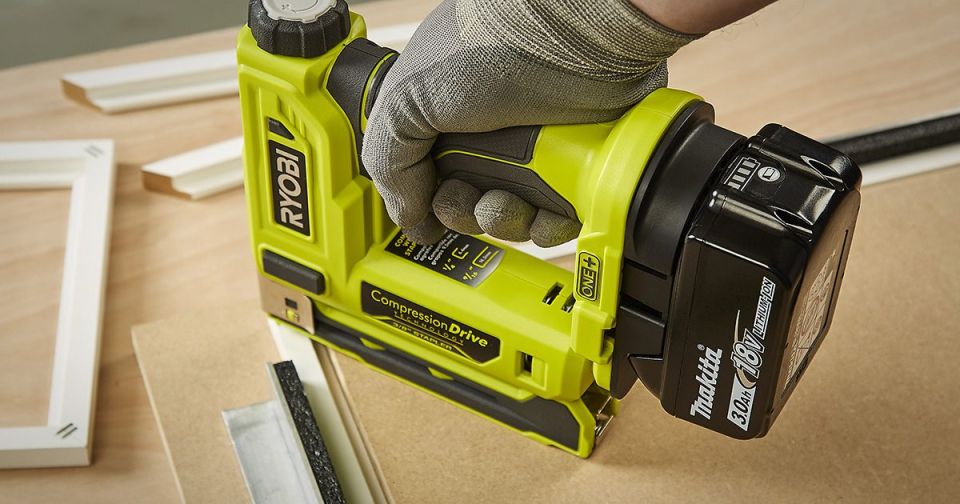
Ryobi One+ stapler reinforcing wooden frame

If you’re itching to make something from scratch, the Ryobi One+ range has a huge selection of tools that can help. Just convert your existing 18V battery with a Badaptor, and get started!

Why not start off by framing a favourite print?

You will need:

Wood

Ryobi One+ cordless mitre saw

Ryobi One+ cordless hand router

Wood glue

Clamps or tape

Ryobi One+ cordless stapler

Make your frame

To begin, decide which print or picture you want to frame, and measure up accordingly. You’ll need to consider the outside length of your frame, the inside length, and the rabbet, which will need to be right to ensure your artwork fits in the glass.

Cut the lengths of wood to size, setting up the mitre saw to cut the ends at 45-degree angles so you can make the joints later.

Next, use your router cut a recess into the inside lengths of the wood, for the glass to sit in.

When you’re ready to assemble your frame, put a small coating of wood glue on the inside of the joints, but don’t assemble the frame right away. Let this dry, then apply a second layer of glue (it’s less likely to be absorbed by the wood this time, due to the application of the previous coat).

Assemble the joints while the glue is wet, and either clamp up the corners of the frame, or tape them together. Apply staples to the back of the joints for extra reinforcement (if the corners of your frame are clamped, the frame can be stapled right away, but if you’re using tape then let the glue dry and remove the tape before stapling).

If you’re not a Ryobi One+ user, but would like access to the range, a Badaptor can help. Choose from one of four models to convert your existing DeWalt 18-20V, Makita, Milwaukee or Bosch Professional 18V battery for use with the entire Ryobi One+ range of 18V tools.

Get your Badaptor at badaptor.com now.

Comment

  • It’s great that you elaborated that you should measure the size of the frame properly to prevent problems. My wife told me the other night that she was hoping to find a custom picture frame service as she wants the art of our son to be framed, and she asked if I had any idea what would be the best option to consider. Thanks to this informative article, I’ll be sure to tell her that she can consult a trusted custom picture framing service as they can provide her desired design.

Leave a Reply

Your email address will not be published. Required fields are marked *


© 2022 Badaptor Power Tool Battery Adaptors, All Rights Reserved

0
YOUR CART
  • No products in the cart.