fbpx
Convertire queste batterie
  • DeWalt
    • Da DeWalt a Ryobi
    • Da DeWalt a Makita
    • DeWalt a Milwaukee
    • DeWalt a Erbauer
    • DeWalt a Mac Allister
  • AEG
    • Da DeWalt a Ryobi
    • Da DeWalt a Makita
    • DeWalt a Milwaukee
    • DeWalt a Erbauer
    • DeWalt a Mac Allister
  • Hikoki
    • Da DeWalt a Ryobi
    • Da DeWalt a Makita
    • DeWalt a Milwaukee
    • DeWalt a Erbauer
    • DeWalt a Mac Allister
  • Makita
    • Da DeWalt a Ryobi
    • Da DeWalt a Makita
    • DeWalt a Milwaukee
    • DeWalt a Erbauer
    • DeWalt a Mac Allister
  • Ridgid
    • Da DeWalt a Ryobi
    • Da DeWalt a Makita
    • DeWalt a Milwaukee
    • DeWalt a Erbauer
    • DeWalt a Mac Allister
  • Mac Allister
    • Da DeWalt a Ryobi
    • Da DeWalt a Makita
    • DeWalt a Milwaukee
    • DeWalt a Erbauer
    • DeWalt a Mac Allister
  • Milwuakee
    • Da DeWalt a Ryobi
    • Da DeWalt a Makita
    • DeWalt a Milwaukee
    • DeWalt a Erbauer
    • DeWalt a Mac Allister
  • Metabo CAS
    • Da DeWalt a Ryobi
    • Da DeWalt a Makita
    • DeWalt a Milwaukee
    • DeWalt a Erbauer
    • DeWalt a Mac Allister
  • Flessibile
    • Da DeWalt a Ryobi
    • Da DeWalt a Makita
    • DeWalt a Milwaukee
    • DeWalt a Erbauer
    • DeWalt a Mac Allister
  • Bosch Pro
    • Da DeWalt a Ryobi
    • Da DeWalt a Makita
    • DeWalt a Milwaukee
    • DeWalt a Erbauer
    • DeWalt a Mac Allister
  • Erbauer
    • Da DeWalt a Ryobi
    • Da DeWalt a Makita
    • DeWalt a Milwaukee
    • DeWalt a Erbauer
    • DeWalt a Mac Allister
  • Festool
    • Da DeWalt a Ryobi
    • Da DeWalt a Makita
    • DeWalt a Milwaukee
    • DeWalt a Erbauer
    • DeWalt a Mac Allister
Convertitevi a questi utensili elettrici
  • DeWalt
    • Da DeWalt a Ryobi
    • Da DeWalt a Makita
    • DeWalt a Milwaukee
    • DeWalt a Erbauer
    • DeWalt a Mac Allister
  • AEG
    • Da DeWalt a Ryobi
    • Da DeWalt a Makita
    • DeWalt a Milwaukee
    • DeWalt a Erbauer
    • DeWalt a Mac Allister
  • Hikoki
    • Da DeWalt a Ryobi
    • Da DeWalt a Makita
    • DeWalt a Milwaukee
    • DeWalt a Erbauer
    • DeWalt a Mac Allister
  • Makita
    • Da DeWalt a Ryobi
    • Da DeWalt a Makita
    • DeWalt a Milwaukee
    • DeWalt a Erbauer
    • DeWalt a Mac Allister
  • Ridgid
    • Da DeWalt a Ryobi
    • Da DeWalt a Makita
    • DeWalt a Milwaukee
    • DeWalt a Erbauer
    • DeWalt a Mac Allister
  • Mac Allister
    • Da DeWalt a Ryobi
    • Da DeWalt a Makita
    • DeWalt a Milwaukee
    • DeWalt a Erbauer
    • DeWalt a Mac Allister
  • Milwuakee
    • Da DeWalt a Ryobi
    • Da DeWalt a Makita
    • DeWalt a Milwaukee
    • DeWalt a Erbauer
    • DeWalt a Mac Allister
  • Metabo CAS
    • Da DeWalt a Ryobi
    • Da DeWalt a Makita
    • DeWalt a Milwaukee
    • DeWalt a Erbauer
    • DeWalt a Mac Allister
  • Flessibile
    • Da DeWalt a Ryobi
    • Da DeWalt a Makita
    • DeWalt a Milwaukee
    • DeWalt a Erbauer
    • DeWalt a Mac Allister
  • Bosch Pro
    • Da DeWalt a Ryobi
    • Da DeWalt a Makita
    • DeWalt a Milwaukee
    • DeWalt a Erbauer
    • DeWalt a Mac Allister
  • Erbauer
    • Da DeWalt a Ryobi
    • Da DeWalt a Makita
    • DeWalt a Milwaukee
    • DeWalt a Erbauer
    • DeWalt a Mac Allister
  • Festool
    • Da DeWalt a Ryobi
    • Da DeWalt a Makita
    • DeWalt a Milwaukee
    • DeWalt a Erbauer
    • DeWalt a Mac Allister

Circa

Blog

Consegna gratuita su tutti gli ordini nel Regno Unito continentale

How to create a gallery wall

| | 1 Commento

Gallery wall with hanging pictures

Are your walls at home feeling a little bland? Bring them to life by creating an eye-catching gallery wall. It’s an easy way to make a statement, and display all your favourite prints and photos at the same time.

You will need:

  • A selection of framed prints
  • Paper, pencil, rubber and ruler for templates (optional)
  • Screws and Rawl plugs
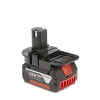
  • Ryobi One+ Cordless Brushless Drill Driver
  • Ryobi One+ 18V Hand Vac
  • Spirit level

Create your gallery wall

Decide on which images you want to use, and on the layout you want to create. For example, if all your images are the same size, it might work better to use a more uniform layout. If they’re all different sizes, you could consider a more random arrangement.

Measure up your wall space so you know what you have to work with. Lay your pictures out on the floor and arrange them within the space available until you’re happy. At this stage, you can measure up and cut out paper templates of each frame to help you place your images on the wall and space them out correctly.

Now you’re ready to start hanging your frames.

If you’re using templates, arrange these on the walls so that you can see where each picture will hang. If you’re not using templates, lightly mark on the wall where the top corners of the frames will be. Measure and mark where you need the holes for each frame and use a drill, like the One+ Cordless Brushless Drill Driver from Ryobi, to drill into the walls. Use the One+ Hand Vac to catch any brick dust or debris.

Insert a Rawl plug into the freshly drilled hole, followed by a screw. Hang your frame and repeat these steps until all of your pictures are up on the wall. Use the spirit level to make sure that everything is straight, and give the floor another once-over with your Hand Vac.

Then sit back and enjoy your new gallery wall!

If you don’t have a Ryobi One+ battery, you can still use tools from the One+ range to create your gallery wall.

With a Badaptor battery adaptor, you can convert a DeWalt 18-20V, Makita, Milwaukee or Bosch Professional 18V battery for use with the entire range of Ryobi One+ 18V tools.

Find out more or order now at badaptor.com.

Commento

  • It’s interesting to know how you’d create and publish magazines with the help of software solutions. The other day, I heard that my younger sister started working on a school project about creating a magazine for the students, and I think she’d love to hear about your insight. Thank you for the information on using technology to make your magazine accessible to mobile users.

Lascia una risposta

Il vostro indirizzo e-mail non sarà pubblicato. I campi obbligatori sono contrassegnati da *


loading="lazy"

© 2022 Badaptor Adattatori per batterie di utensili elettrici, Tutti i diritti riservati

0
IL CARRELLO
  • Nessun prodotto nel carrello.